Wind Damage To Roof
Mighty Dog Roofing provides the the best choice located at Plano Texas for wind damages to roofs professionals will work diligently to restore your home’s rooftop as quickly as possible. Damage to your roof from wind in Plano Texas can be frightening. But, once the weather system is over it’s important to remain calm and contact our roofing company immediately after talking with your homeowner’s insurance agent. No matter what you do, steer clear of the “snowbird” individuals who will be wandering around your property and waiting to have you sign a contract that allows them to fix your roof. We won’t ever require you to sign a contract to perform any work that is done on your property. We just want to complete the work properly so we are able to gain your trust.
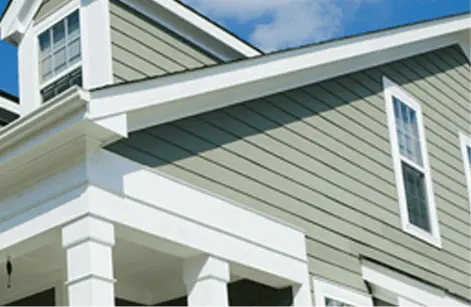
Roof Shingle Wind Damage – Clearing Up the Confusion
Preparing Your Home for Wind Damage Before the Storm
There is not enough time or warning to ensure you have shelter from a hurricane or tornado and any other severe storm. That’s why you need to prepare your home before the storm hits.
It is important to think about the particulars of your home and the finances available to you and the building codes in your area. The Federal Emergency Management Agency has a checklist for homeowners:
How to Avoid Wind Damage
- Be aware of the risks. Are you familiar with the risks that can be found in your locality? What are the most frequent reasons for windstorms and flooding in your area? Call your emergency management office, or American Red Cross chapter for more information.
- Be sure that the roof sheathing has been correctly installed. The roof sheathing is the boards or plywood nailed to your roof rafters , or trusses. The force of wind can move from the roof onto the exterior walls and eventually on to the foundation in an intense storm. Homes are damaged when winds are not transferred properly to the ground in a storm. Wind is transferred to the ground by properly installed sheathing. Be sure that the nails used for sheathing do not touch the rafters. If they have you’ll need to redo them.
- End gables must be connected to the roof. In a hurricane or another wind storm, the side walls of the roof (end gables) endure a lot of damage and can collapse. Gable bracing is often made up of two-by-fours that are set in an “X” form at the top and bottom of the attic. It runs across the top of the end gables up to the brace of fourth truss and the lowest end gables down until the roof’s highest point, according to Federal Emergency Management Agency.
- Galvanized hurricane straps are used to secure your roof onto the wall. Galvanized hurricane straps ensure that the roof is secured to the wall during a powerful storm. If you reside in an area that is at a high danger of hurricanes, be sure that you put these straps on.
Check that your garage door is securely closed. In a windstorm the garage door may be easily torn off, which allows wind to enter your home and blow out doors, windows and walls. It could even blow out the roof. Contact a reputable garage door firm for help.
- Storm shutters can shield your windows. Installing storm shutters is one of the best ways you can safeguard your home from strong winds. You can purchase these in aluminum, wood, or steel.
Wind Damage and Water Intrusion
Your home could be damaged by tornadoes, gales or hurricanes. We’ve all seen pictures of homes ravaged by winds, the roofs toppled or trees falling through walls, however often the damage is far more subtle. A loose or missing shingle, a gutter pulled away from the house, or a shattered seal around a window or vent can allow water into the house, causing significant damage over time.
Although the construction of a house is simple, each component is a key component. The water runs across the shingles until it reaches the gutter, and is able to remove it from the building. Rainwater is kept from coming into the house by the sealing of the doors and windows. If any component of the system fails due to of wind, water will start to seep into the house and take its toll. This could compromise the structural integrity of your home.
Sometimes, the damage is subtle and not immediately apparent. The water can enter the walls and collect on the wooden structures beneath and behind. Leaks in the roof can cause rainwater to penetrate sheetrock and insulation, causing damage to the structure. In time, this can result in the wood rotting and mold and mildew to grow and eventually cause serious structural damage. If there is any visible sign like a brown spot on your ceiling, major harm could have already taken place.
It is essential to get a professional assessment of any water or wind-related problems immediately. To expose damaged areas, ceilings and walls might have to be removed. Dehumidifiers and fans may need to be installed to dry the areas that are damp. Special skills and tools are required to get rid of mildew and mold that can persist for years and cause health problems for pets and family members.
Following any unusual storm that is heavy rain or high winds, you should make an extensive inspection of both the inside and outside of your home. You should inspect your attic for signs of moisture or leaks. Check the gutters, soffits and windows for any damage caused by wind. If there is any doubt, it’s moment to call in an expert who is aware of what to look out for and how to avoid future damages.
Avoiding Roof Damage And Roof Repair Costs
Many people don’t check their roofs regularly, but they are shocked to discover that they’ve got roof damage or have to fix it. It is essential to keep your roof in good order. It is an extremely difficult space in your home that could result in serious damage. This can help you avoid unnecessary expenses that could be put towards other essential things.
Maintaining a roof is completed regardless of the roof’s material, while the material depends on the climate, weather conditions or location of your residence. Roof repair and damage is more likely when you live in an area that experiences frequent hurricanes, tornadoes, or heavy snowfall. It doesn’t matter whether you reside in a humid, hot or snowy location it is essential to inspect your roofs.
Roof Claims: Hail and Wind Storm Damage
The first line of protection against elements is your roof. On a sunny day the sun could heat up your roof to unbearable temperatures. On a rainy day it is the first one to be soaked by rain. On a windy day your roof’s shingles may be blown off or ripped off from your house. Finally, on those stormy days, hail storms can slash your roof and cause thousands of dollars of damages. What kind of damage could a hail or wind storm actually cause? The most common type. This is the damage caused by wind, hail or both.
The 2009 hailstorms caused property damage of over $1.2 billion in the United States. Often times this type of roof damage isn’t evident until other areas of your home are affected. Hail damage can cause a decrease in the life expectancy of your shingles. Hail damage can occur when hail strikes the roofing shingles. The top layer of granules in the matting are removed, causing small circular marks to the shingles. These tiny marks may cause leaks that could cause more serious damage like internal drywall rot, or injury to the roof’s decking. Even though it can take months for these little spots to begin to leak but the primary cause of the damage is hail. In the event of a delay in repairs, it could result in a breach of the time-limits set by the homeowner’s insurance company which leaves you, as the homeowner accountable. It is essential to conduct an immediate inspection. Don’t hesitate to report the leaky roof to a storm restoration expert.
Wind damage occurs when strong wind gusts cause the shingles to be blown in a manner that they be cracked, creased, or blow completely off the roof decking. Creased or cracked shingles become weaker and keep blowing back during future storms. The weakened crease can cause the shingle tabs to pull away, exposing the decking of the roof. Sometimes, shingles rise from the shingle below and debris may get trapped beneath. When debris has gotten underneath the shingle, it can no longer properly adhere to the roof. The damage caused by these types of debris will affect the strength of the roof, resulting in the roof to leak and cause further damage.
Wind Damage To Roof FAQs
Often time damage from a storm is not visible to the untrained eye. That’s why it is very important that after a storm you have a qualified roofing contractor to come and inspect your home.
WHAT IF I MUST FILE AN INSURANCE CLAIM?
If there is damage to your home, contact your insurance company as soon as possible for an adjuster to come to your home and appraise the damage. Remember, in a disaster situation, someone may not come immediately. Try to be patient.
HOW LONG DO I HAVE TO FILE A CLAIM?
In most cases, you have one year from the date of the storm to file a claim, however all policies are different and some state you have as little as six months. The best thing to do is call a roofing contractor soon after the storm to do an inspection.
WILL MY PREMIUMS GO UP IF I FILE A CLAIM?
Filing a single claim should not raise your premiums especially from an “act of God” However if a region is hit by a major storm the whole regions premiums could go up.
DO I NEED A ROOFING CONTRACTOR INVOLVED IN THE PROCESS?
You do not have to have a roofing contractor to file a claim, however it is beneficial to have a trained contractor on site to meet with you adjuster so nothing is overlooked and you get a fair assessment of the damages.
Slate Roofing Installation
Mighty Dog Roofing provides the the best choice for roofer slate roofing installers located at Plano Texas. Our Plano slate roofing installers are among the finest across the region. That’ll make them one of the most reputable roofing contractors in Plano. Since 1960, we have installed slate roofs. Because we understand how important these components are, we’ll never cut corners. We are able to deliver a high-quality product and top-quality service.
Slate Roof Installation With Hip and Ridge Joints
Slate roofs are preferred by many as they are among the best types of roofs. Though the installation cost quite a bit of money, slate roofs are great in improving the general appeal of the housing. Usually, homes with this type of roof installation have higher values.
Slate roof installation involves setting the hip and ridge joints. Before slating the roof, furring strips along the hip need to be installed. The standard thickness of slates is 3/16″ to 1/4 “. For slates with this thickness, 3/4″ furring strips are recommended. Nail these furring strips to the roof using 2.5″ hot dipped galvanized common nails.
On the bottom of the furring strips, install the first piece of the copper flashing using 1.5 copper roofing nail. To hide the furring strips, fold the bottom of the flashing.
Slate roof installation follows after the copper flashing has been nailed and folded. Install the slates over the flashing by nailing them into the furring strips. 1.5 copper roofing nails can be used but certain areas need to be attached with 2.5 copper roofing nails.
Install the next piece of step flashing over the hip slates. For this, a single nail will do. After this, nail the next pair of hip slates over it with at least two nails per slate. Fold the flashing lengthwise in half with 4″ in each side. With this, the overlying slates and flashings, the 16″ hip slates are to be overlapped halfway. Meanwhile, the step flashings would be overlapping each other by 2″.
Continue the setting up in this manner, flashing over the top of each pair of hip slates. The hip slates can be installed even without cutting and they do not to be tapered as well. To finish quickly, install the slates in pairs, not one side at a time.
Slate Roofing Made Easy – Choosing The Right Tools And Materials
It is highly recommended that you do your research prior to building slate roofing. Preparation is the key to success, so before you start make sure you know about slate types, their production techniques flashing, sheathing nails and roofing materials as and slate roofing tools.
The first step is to ensure whether your roof is suitable for the installation of a slate roof. The slate roof shouldn’t be put up with a slope less than 4:12. This is at a minimum of 12 feet of elevation over 12 feet of running. If your roof is in compliance with this standard, you should give thought to buying the right equipment for slating and slates as well as other materials needed to complete the task.
Tools
Get the correct slate tools and apply them. The basic toolkit you should have should consist of an a slate ripper slate cutter, and a slate hammer. Choose a slate cutter and not a diamond saw when cutting slates. The slate cutter produces an edge with a bevel that is identical to the other slates. Diamond blades create an edge that appears square, which is odd.
Slates
There are a variety of slates to choose from, and different slates may not be alike. You need to choose the appropriate slates for your roofing. Take into consideration the quality and thickness, size and type of slates you’re considering when choosing them. Thicker slates can be harder to cut, whereas smaller slates will take you longer to install because there are more of them.
Check to ensure that the nails are exactly where they should be on the slates. The holes should be positioned in a manner that you can get the nails just above the head of the slate underneath. If the nail holes are too low, you’ll be nailing right into the head of the slate beneath it, and should not do that as it can cause leaks.
Make sure that you purchase the right quantity of slates. It is important to determine your head lap ahead of time and purchase enough slates to accommodate this. It is recommended to purchase slates for your starter course separately. The starter course slates should have the nail holes on only the front and top.
Materials
Slate Nails
Make sure you use quality nails. Make use of stainless steel or aluminium nails to nail slate. Copper nails are preferred for coastal areas and silicon-bronze nails are best for severe conditions.
The correct length of nails is essential. When you set your nails, make sure they only penetrate the roof deck boards. This is important because if the they are too long, they’ll traverse the board, breaking and splintering the wood on the back. This can reduce the boards’ thickness as well as the ability to hold the boards. nails.
Decking material
The decking materials beneath the slate should last at least as long as the slates themselves, which is why it is important to select materials that are strong enough to last. This is accomplished by wooden boards and battens with a thickness of 20-40mm. They can be rough-sawn, planned or of tongue-in-groove type. Other durable decking materials are concrete that can be nail-nailed or Gypsum. Avoid plywood and laminated wood.
Underlay
Underlay is not necessary for slate roofing. Underlay is essentially used to keep water out until slate tiles are laid and the flashings are in place. It can also be used for drawing chalk lines. A single layer of 30lb felt is sufficient in most cases.
Flashing material
A good flashing material is vital. Copper stainless steel, stainless steel or sheet lead are all good choices. It is better to choose a heavier material for gutters and valleys, than for ridges and chimney flashings.
Slate Roofing For Your House
If you’ve decided to slate roof your house on your own, there are a few things you need to have ready before you jump in. Let’s now look at the many issues that come from slate roofing. The first thing you need to verify is that your roof has a slope ratio greater than 4:12. In other words it should have a rise of 4 feet over 12 feet.
Roofing Tools
The basic tools for roofing slates include a cutter, a slate ripper and a slate hammer. Do not use diamond saws to cut slates with the square edge. Instead, use the slate cutter to create a clean finish.
Slate Type
Slates are available in various forms, just like any other construction material. Slates are available in a range of materials and quality and also in varying size and thickness. The slate you pick will determine how you put your roof up. It is important to make sure that the slates have enough space for the nail to pass through the top of the slate. This will ensure that there won’t be any leaks.
After you’ve decided on the type of slate that is going be used to build your roof, you must purchase the appropriate quantity of slates. If you fall short, and you return to the shop you might find the slates are gone, and you’ll have a roof which looks like a patch work. You might need to buy additional slates in case any plates are damaged during the roof construction. It is not a bad idea to purchase the starter slates in a separate package.
Other Materials
A large number of nails will be needed for slate roofing. So, use nails which are made from aluminium or stainless steel since they are not susceptible to rust in comparison to iron nails. If you reside in an area that has severe weather conditions , then copper nails are the ones to go with. For slate roofing the length of nails is crucial. The nails shouldn’t go beyond the roof deck. Anything more will cause damage to the wooden boards.
Along with nails, you will be decking your slates in addition. They must be the same size like the slates below. Avoid laminated wood and plywood decks. If you wish to, you can put in an underlay to hold water until slates are laid.